Adventures with the Daylight Machine
April 14, 2011 4 Comments
So this year is the first year I’ve started my garden from seed. I’ve previously bought organic seedlings from my local garden store. At $3-5 each – while they are wonderful, they are nowhere near economical. So in 2011 when I found myself on a tighter budget than ever, it only made sense to start from scratch.
The first problem: gorgeous catalogs from Comstock Ferre, Baker Creek, John Scheeper’s Kitchen Garden Seeds, Seed Savers Exchange and more. I’m sure every gardener suffers from I-want-one-of-everything-itis, but this was my first experience. I made a fairly conservative budget of $50. I even stuck to it – within $5. I also had to limit my choices of veg. We rent a home that has fairly limited garden space – so even though I want to grow prolific beds of squash and garlic… not going to happen this year. Our soil is also largely shaded… so most of the veg will be in one sunny spot in containers. I knew I wanted many kinds of tomatoes and peppers – easy to do in containers. I was gifted a few different kinds of beans and greens in a seed swap. The addition of a few herbs and some free onions completed the plan.
The second problem: lack of knowledge. I will be the first to admit – I am a total n00b at this. I was not about to put blood, sweat and tears into this massive project, only to have it fail and THEN find out that I could have avoided the disaster. Luckily, Comstock Ferre does not just sell fantastic heirloom seeds, but they also happen to host workshops. And they happen to be only half an hour from my house. And they happened to have a seed starting workshop in mid-March. Sometimes things just work out.
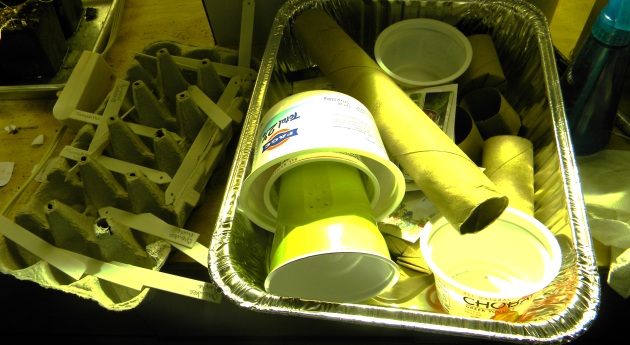
The third problem: equipment. You can spend hundreds of dollars on an indoor light setup. And – lets face it – this is New England, a.k.a. the land of the April Nor’easter. Needless to say, my plants aren’t going outside until six weeks from the last frost. I am hoping to get them outside around Memorial Day. We have a fairly chilly basement/workshop, which was to be the place for our grand experiment. This is really the area of this where I am most proud – and most frugal. I saved egg cartons, cardboard tubes from toilet paper and paper towels, arugula and strawberry containers, and yogurt/sour cream containers for months. I spent $10 on disposable foil food containers with plastic lids to use as humidity domes for the tomatoes and peppers. I also found a vendor on eBay that built custom heating mats.
Then there’s the light. Have I mentioned Señor SK is a tinkerer? (Did “workshop” give it away?) In his younger days, he built a projector to show movies on the side of his house for friends. He happened to have a metal halide fixture, transformer and capacitor leftover. One trip to Home Depot for a new bulb, sheet metal, pine 2″ x 3″ x 8″s and soil and we were in business.
Total Cost: Approximately $150. For initial outlay – all things we can use next year (except the cardboard and some of the seeds) – not bad.
Oh, have I mentioned why we call it the Daylight Machine?
Future plans:
- Once the heating mat comes in, start the rest of the seeds. The only reason the tomatoes are thriving is that my parents lovingly lent me a heating pad to keep them warm in the interim.
- Planting: onions and chard in a whiskey barrel planter or two. Spinach in a dresser drawer bed. Peppers and basil and tomatoes and basil together in respective whiskey barrel planters. Dill and Cucumbers in the cucumber bed. Beans and Rosemary (and more Chard) planted in something I’m not quite sure of yet, but probably near the fence so they can use it to grow vertically. Speaking of beans – Comstock Ferre suggested rolling them in inoculant to grow. Really necessary? Thoughts?
Anyway, welcome to my grand experiment. I’ll keep you posted. If anyone has any suggestions – feel free to chime in!


We never do “ANYTHING” half way . . . but I am now aware that it’s just part of the charm of the Snow Flake Kitchen persona . . .
I have a lot of hardier greens already planted outside. They can handle the cold, and give me a big jump on the season. I think inoculant is useful, and they say to wet the legumes and roll them in it before planting, but when I forget I just sprinkle it over the rows. My peas and beans do pretty well. Good for you to set up such a nice incubator.
Pingback: Spring Garden Update « Snowflake Kitchen
Pingback: Spring Garden Update | Snowflake Kitchen